Deploy |RCE| From a Hosted Server
If you wish to deploy your own |RCE| instance from something like a Digital Ocean droplet, or a hetzner server use the following instructions to get it setup.
I'm using an Ubuntu 14.04 image for the purposes of this tutorial, but all other Unix environments will be pretty similar. You can check out the full lists of supported platforms and versions in the :ref:`system-overview-ref` section.
Create a Digital Ocean Droplet
- Sign into Digital Ocean.
- Create a Droplet choosing Ubuntu 14.04 as your |os|.
- (Optional) Add SSH keys if you have them set up.
Configure Your Server
Once you have your server created, you need to sign into it and set it up to host |RCE|.
- Open a terminal and sign into your server. Digital Ocean will mail you the IP address. You'll need to change your password on the first login if you don not have SSH keys set up.
$ ssh root@203.0.113.113
- It is not advised to install |RCE| as the root user. So create a user with sudo permissions and then carry out the rest of the steps from that user account.
# Create a user with sudo permissions
root@rhodecode:~# sudo useradd -m -s /bin/bash -d /home/brian -U brian
root@rhodecode:~# sudo usermod -a -G sudo brian

# Set the password for that user
root@rhodecode:~# passwd brian
Enter new UNIX password:
Retype new UNIX password:
passwd: password updated successfully

# Switch to that user for the rest of the steps
root@rhodecode:~# su brian

# You should see your home dir change to what was set during installation
brian@rhodecode:~$ cd ~
brian@rhodecode:~$ pwd
/home/brian
Once you have this set up, you are ready to install |RCC|.
Install |RCC|
|RCC| will install and manage the package dependencies for your |RCE| instance.
- Download the |RCC| installer from https://rhodecode.com/download/
- Once downloaded to your computer, transfer the package to your server
Note
These steps happen on your computer, not on the server.
# Change to where the file is downloaded
$ cd Downloads/

# SFTP to your server
$ sftp brian@203.0.113.113

# Use mput to transfer the file
sftp> mput RhodeCode-installer-linux-391_b1a804c4d69b_d6c087d520e3
Uploading RhodeCode-installer-linux-391_b1a804c4d69b_d6c087d520e3 to /home/brian/RhodeCode-installer-linux-391_b1a804c4d69b_d6c087d520e3
RhodeCode-installer-linux-391_b1a804c4d69b_d6c087d 100%  289MB   4.1MB/s   01:11
sftp> exit
The |RCC| installer is now on your server, and you can read the full instructions here :ref:`Install RhodeCode Control <control:rcc-install-ref>`, but below is the example shortcut.
# Check that the script is uploaded to your home directory
$ ls -1
RhodeCode-installer-linux-391_b1a804c4d69b_d6c087d520e3

# Change the script permissions
$ chmod 755 RhodeCode-installer-linux*

# Run the installer and accept the prompts
$ ./RhodeCode-installer-linux-*
Important
Once finished, exit the terminal and sign in again. This is to refresh you session to pick up the new commands.
Install |RCE|
Now that |RCC| is installed, you can install |RCE|. For the full instructions, see :ref:`Install RhodeCode Enterprise <control:rce-cli-install-ref>`, but the below is an example shortcut.
# Install a VCS Server and follow the prompts
$ rccontrol install VCSServer --start-at-boot

Extracting VCSServer ...
Configuring RhodeCode VCS Server ...
Supervisord state is: RUNNING
Added process group vcsserver-1

# Install a RhodeCode Enterprise instance and follow the prompts
$ rccontrol install Enterprise --start-at-boot

Configuration of RhodeCode Enterprise passed.
Supervisord state is: RUNNING
Added process group enterprise-1
|RCE| is now installed on your server, and is running on the port displayed by the rccontrol status command.
brian@rhodecode:~$ rccontrol status

 - NAME: enterprise-1
 - STATUS: RUNNING
 - TYPE: Enterprise
 - VERSION: 3.1.1
 - URL: http://127.0.0.1:10002

 - NAME: vcsserver-1
 - STATUS: RUNNING
 - TYPE: VCSServer
 - VERSION: 1.1.1
 - URL: http://127.0.0.1:10001
Serve |RCE| using Nginx
Now that |RCE| is running, you need to use Nginx or Apache to serve it to users. For detailed instructions about setting up your webserver, see the :ref:`rhodecode-admin-ref` section. But the below shortcut should help serve it.
- Install Nginx on your server.
# Install nginx
$ sudo apt-get install nginx
- Create a virtual hosts file for RhodeCode Enterprise. Create the file in this location :file:`/etc/nginx/sites-available`. In this demo I have called it vcs.conf
# Create the file
$ sudo vi /etc/nginx/sites-available/vcs.conf
Use the following example to create yours.
server {
    listen 80;
    # Change to your IP, or a domain name if you've set that up
    server_name     203.0.113.113 ;

    location / {
    # Set this line to match the RhodeCode Enterprise Instance URL
        proxy_pass          http://127.0.0.1:10002/;
        proxy_set_header    Host $Host;
        proxy_buffering             off;
    # Setting this to a high number allows large repo pushes
        client_max_body_size        4G;
        }
    }
- Symlink the virtual hosts file to the sites-enabled folder, and then restart Nginx.
# Symlink the virtual hosts file
$ ln -s /etc/nginx/sites-available/vcs.conf /etc/nginx/sites-enabled/vcs.conf

# You can also delete the Nginx default symlink
$ rm /etc/nginx/sites-enabled/default

# Restart Nginx
$ sudo  /etc/init.d/nginx restart
  * Restarting nginx nginx                                     [ OK ]
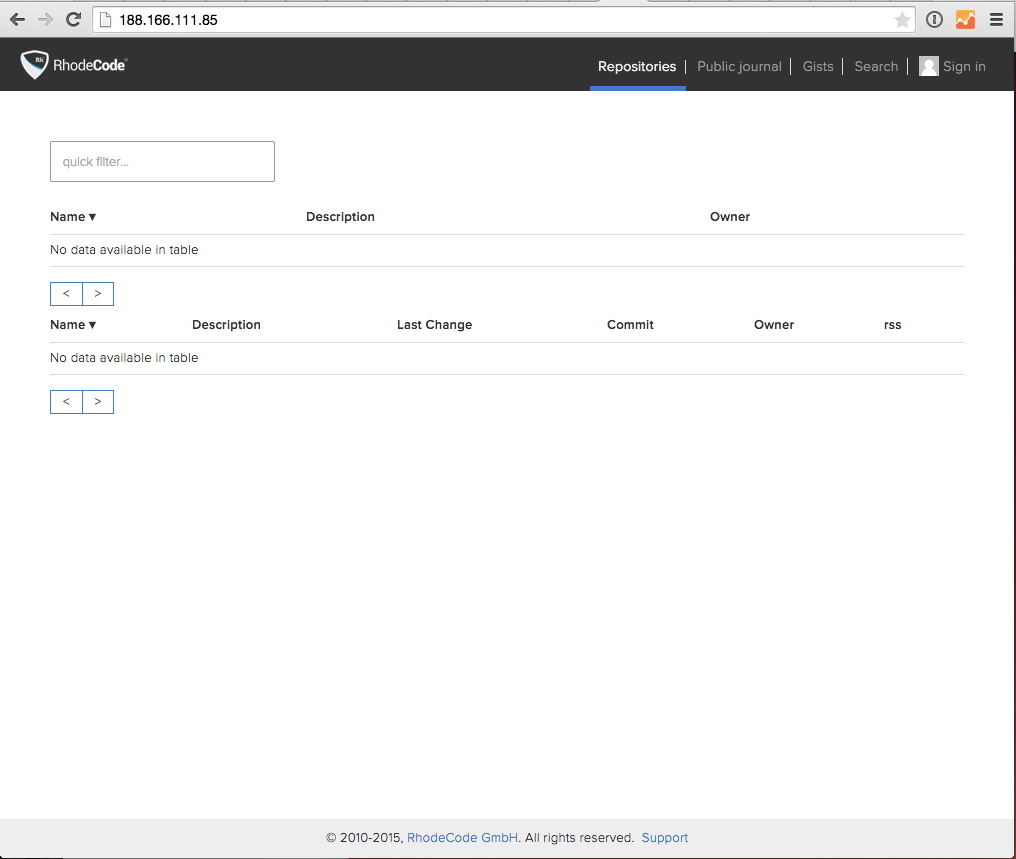
Once restarted, you should see a clean |RCE| instance running on the IP address, or the domain you have set up.