appenlight-setup.rst
103 lines
| 3.8 KiB
| text/x-rst
|
RstLexer
How To Use |AE| to Monitor |RCE|
- For cloud based monitoring using |AE|, sign up for an account first and get your user details.
- For self hosted monitoring, you'll need to download and setup |AE| first. Contact support@rhodecode.com for more details.
|AE| Side Of The Setup
- From the interface, create an application for |AE| to monitor: :menuselection:`Settings --> Create Application`
- Add in your |RCE| instance details.
- Take note of the Public and Private API keys on the application page. You will need to add the private key to your |RCE| configuration file.
For more information, see the the |AE| documentation here.
|RCE| Side Of The Setup
Once you have your |AE| account details, configure the |RCE| :file:`home/{user}/.rccontrol/{instance-id}/rhodecode.ini` file with the following details to set up the connection between the two systems.
Tip
The section below should already be present in your configuration file if running a recent version of |RCE|.
- Enable the |AE| connection by setting appenlight = true.
- Set your |AE| URL using the appenlight.server_url = URL option.
- Set your |AE| |authtoken| using the appenlight.api_key = TOKEN option.
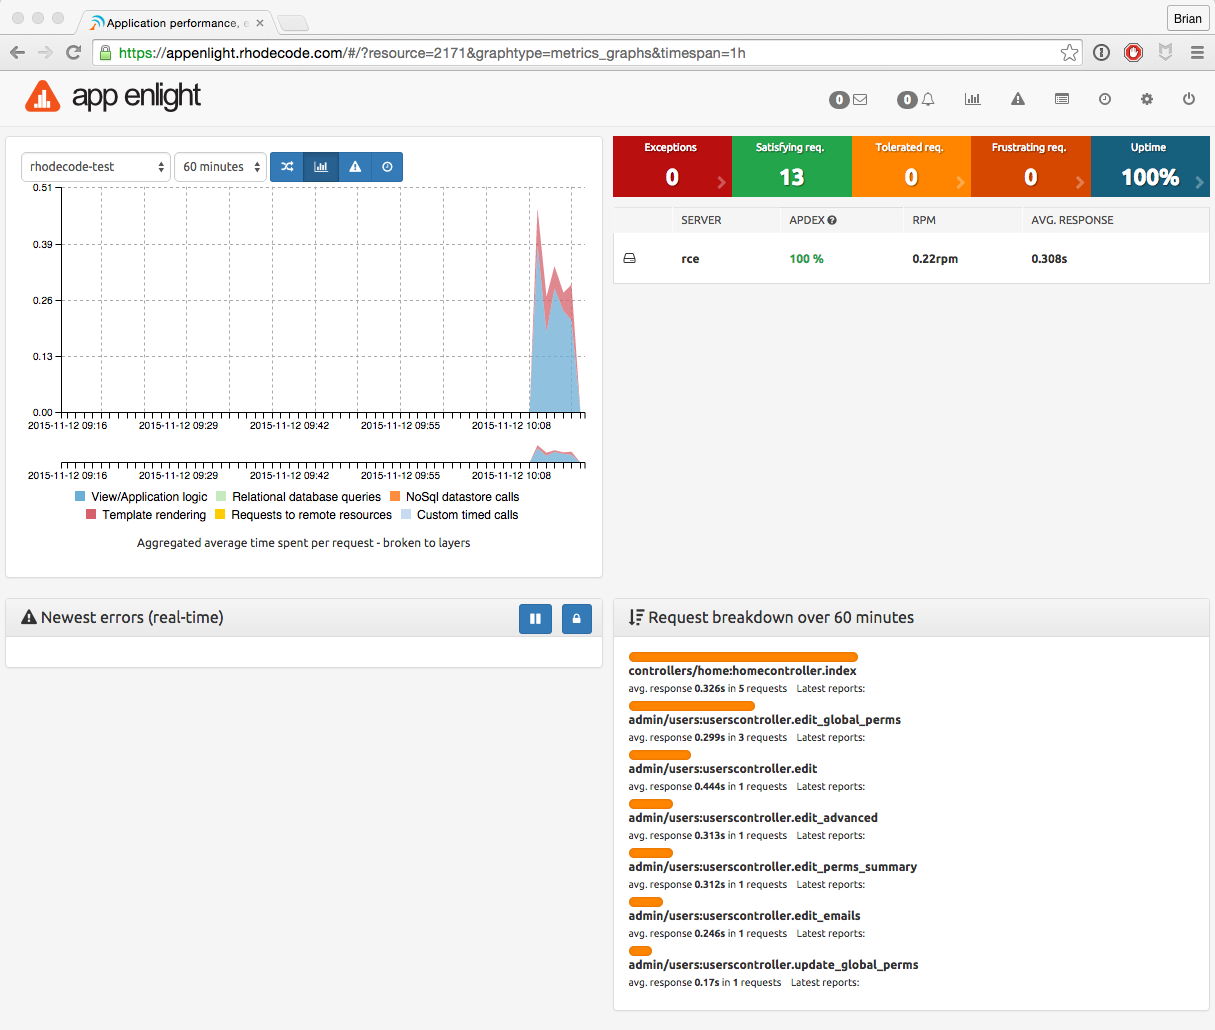
Verifying The Setup
Once |RCE| and |AE| are working together you will see the monitoring begin on your |AE| dashboard when you start carrying out actions in |RCE|.